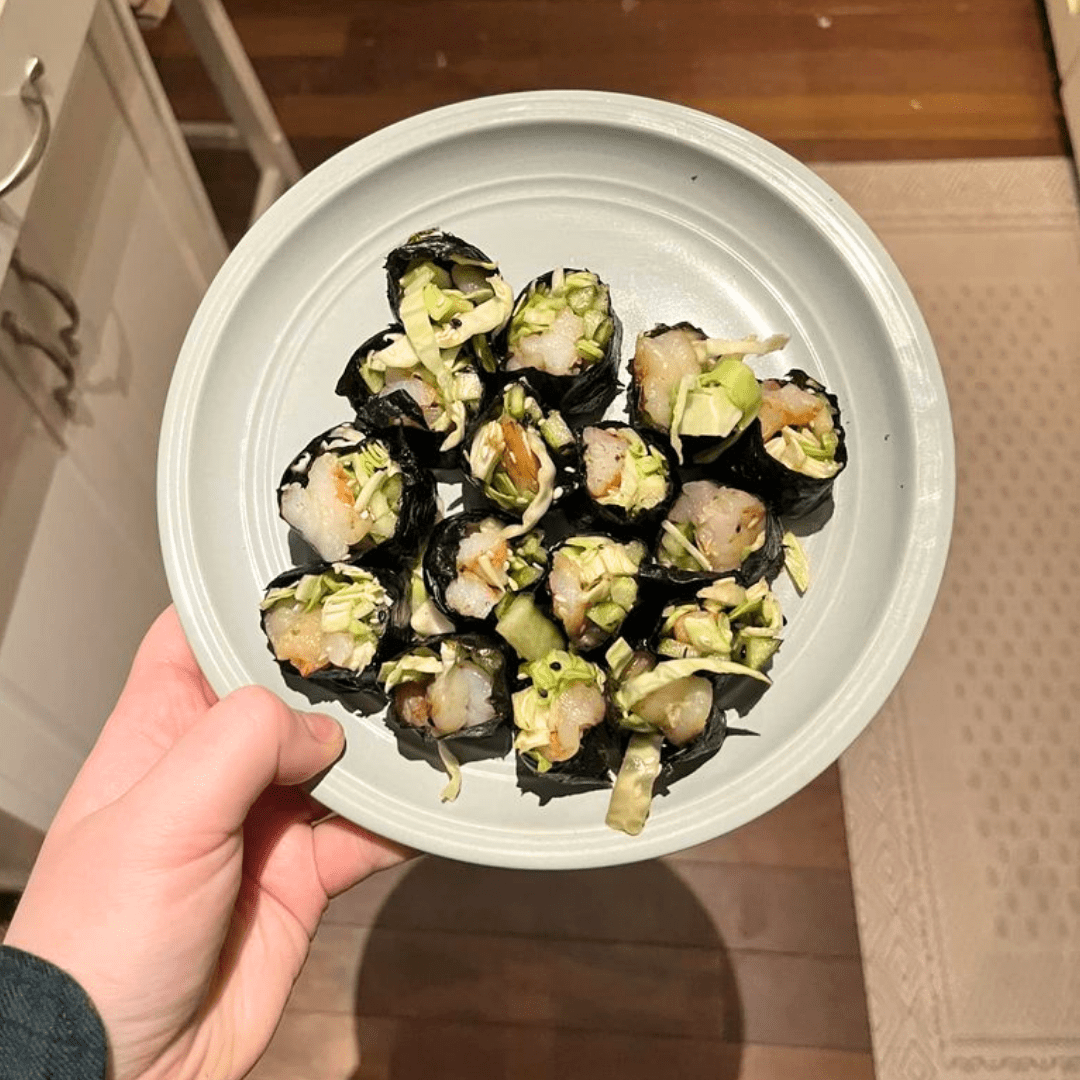
Shrimp Cucumber Cabbage Sushi
Shrimp Cucumber Cabbage Sushi
March 23, 2023
Ingredients
- 2 sheets of Organic Sushi Nori
- 3.5 oz shrimp
- Shredded cabbage (Free Food- did not measure but you can eyeball it to see how much will fit in the roll)
- Cucumber cut into sticks (Free food- did not measure)
- 1 tsp of chopped garlic
- Dash of garlic powder
- Dash of onion salt
- Bragg liquid aminos to taste
- Lemon juice to taste
- Crunchy carbs (optional)
- Chicken broth to cook shrimp in
Preparation
- To prep the shrimp for sushi, (to make sure it cooks flat and not rounded) you have to stretch them out before you cook them - I’ve been cutting little incisions on the underside of the shrimp. I also tossed the shrimp in a bit of lemon juice, garlic powder, and onion salt
- With a small amount of approved non-stick spray in the pan, I browned the shrimp (not too long or it will stick). Then, I added some chicken broth and the chopped garlic - I let it cook for a bit and then added more garlic powder/onion salt.
- While the shrimp was cooking, I chopped up some cabbage in really small shreds and put to the side. I also cut up some cucumber into small sticks like the sushi places do it. I learned after doing it all week that the trick is after cutting is to let pat the cucumber dry and sit in the paper towel.
- Check on the shrimp and make sure to flip/ add chicken broth if necessary.
- Get your seaweed out. The smooth side is on the bottom and the rough side should be facing you. You want the smooth side on the outside of the sushi. I start by putting the cucumber sticks (a cluster of 3-4) - if they’re not long enough then do another cluster. Then I add the shredded cabbage.
- I drizzle some liquid aminos and sprinkle some sesame seeds. Optional step is to crunch up some crunchy carbs and sprinkle over cabbage and cucumber.
- After your shrimp is done cooking - let it cool for a few minutes. Then you can add it to the sushi in a line. I usually have enough shrimp to make two rolls (4 shrimp in each roll)
- Time to roll it up - i don’t have a sushi mat and it’s been fine, you just have to be quick. First step, use your fingers to wet both ends of the nori (like sealing an envelope lol). With the side of the Nori with all the fillings closest to you, lift up the edge gently and bring it around the fillings, the then continue rolling into a tight/firm shape. Once completely rolled, take a (clean) kitchen towel to use as a makeshift sushi mat, to wrap around top of your roll and squeeze to make it more firm.
- Time to cut it - you need probably the sharpest knife in your kitchen. I struggle a lot with this part. I cut the roll in half, and then the halves in half, and then those halves in half (so there’s 8 pieces). I try to be gentle with the cut, and if it’s not working a trick I learned is to wet the knife.
Then you can repeat the process and make a second roll!
- Recipe made by M2 Member, Jen H.
Optional Ideas

Real People. Real Success.
We believe in the program so much we have done it ourselves!
Founder of Alula Wellness, Nan Jenkins, was Our First Client way back in 2011. Since her success in her journey she has dedicated her life to helping others lose weight and exceed their health goals.
Hundreds of people have completed the Breakthrough M2 program and you can too!


